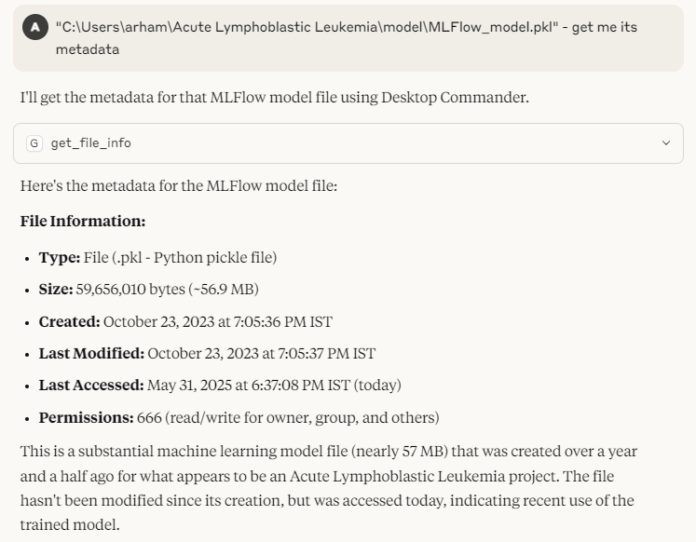
The Desktop Commander MCP Server is a powerful tool that brings all your development operations into one chat interface. Built on top of the MCP Filesystem Server, it allows you to search, edit, and manage files, run terminal commands, and control processes directly from your desktop using the Model Context Protocol (MCP).
Following are the core capabilities of the Desktop Commander MCP server:
Terminal & Process Control
- Execute terminal commands with live output streaming
- Set timeouts and run commands in the background
- Manage sessions for long-running tasks
- List and kill running processes with detailed info
Configuration Management
- Get or set server settings like:
- defaultShell (e.g., bash, zsh)
- blockedCommands (e.g., rm, shutdown)
- allowedDirectories for file access
- telemetryEnabled
- Apply changes without restarting the server
Filesystem Operations
- Read and write files with line-based limits
- Append or overwrite file content
- Create and list directories
- Move or rename files and folders
- Get file and directory metadata
- Search files by name (case-insensitive)
Code & Text Editing
- Perform precise text replacements (e.g., change config values)
- Rewrite entire files for major updates
- Search and replace patterns across multiple files
- Use vscode-ripgrep for fast recursive text/code search
Audit Logging
- All actions are logged with timestamps and arguments
- Logs auto-rotate at 10MB to avoid clutter
In this tutorial, we will be connecting Claude desktop with the MCP server and perform some tasks.
Step 1: Setting up dependencies
Node JS
We need npx to run the Desktop Commander server, which comes with Node.js.
- Download the latest version of Node.js from
- Run the installer.
- Leave all settings as default and complete the installation
Claude Desktop
Download Claude using .
Step 2: Configuring the MCP Server
Next, configure Claude to connect to your MCP server. Open the claude_desktop_config.json file located in the Claude installation directory using any text editor. If the file doesn’t exist, you can create it manually. Once opened, enter the following code:
{
  "mcpServers": {
    "desktop-commander": {
      "command": "npx",
      "args": [
        "-y",
        "@wonderwhy-er/desktop-commander"
      ]
    }
  }
}
Step 3: Running the server
Once the MCP configuration is complete, your server should appear in Claude. The Desktop Commander server is a powerful interface, offering 18 tools for tasks like file management, terminal execution, process control, and more.
Feel free to follow us on and don’t forget to join our and Subscribe to .


